baking with whole foods


I’ve been playing scientist over here. And by scientist, I mean 5th-grade-science-fair-tri-fold-display-board scientist. Not the legit goggles and lab coat kind. I may be good, but I’m not that good.
I’m a scientist because I ran my own little baking experiment. Why yes, I am cool like that. You guys know I like to use different whole grain flours in my baked goods. A little whole wheat pastry flour in this recipe, a little white whole wheat flour in that recipe. But really what’s the diff, right? Can you actually tell when one vs. another is baked up into a goodie?
I made it my mission to find out.
The Experiment:
Bake the exact same recipe using a variety of flours.
The Recipe:
Spiced Pumpkin Honey Muffins. This is one of my go-to crowd-pleasing recipes, so I knew it would be a reliable base from which to judge the different flours.
The Contenders:

From left to right: Whole Wheat Flour, White Whole Wheat Flour, Whole Wheat Pastry Flour, Spelt Flour, Brown Rice Flour. First time spelt and brown rice flour baker here! Exciting stuff.
The Tasters:
Me, obvi. And Dan, who was more than willing to eat multiple muffins in one sitting. For the purpose of science, of course.
The Questions:
How would the final muffins compare to each other in taste, texture, appearance, etc.? Which flour would come out on top?
The Hypothesis:
Umm…I skipped this part. I told you – not the legit kind of scientist!
The Results:
Whole Wheat Flour
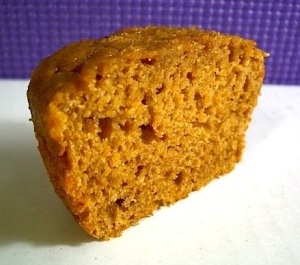
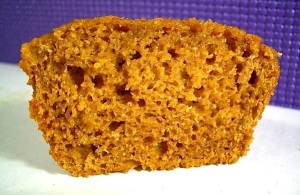
Whole wheat flour was the first flour I ever used in my Spiced Pumpkin Honey Muffins. I always bake them with white whole wheat flour now, so it was fun to go back to my roots! These muffins were the chewiest and wheatiest of the bunch. No surprise there.
White Whole Wheat Flour
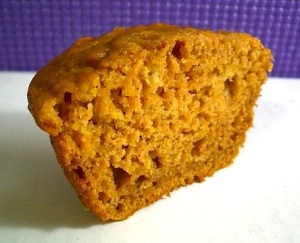
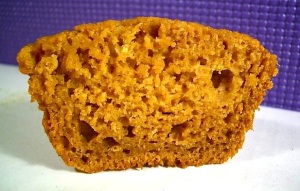
Like I said, white whole wheat flour is now my flour of choice for this recipe, so I’m very familiar with the muffins it produces. But side-by-side with muffins made from other flours, did it stay the one and only? Well, the WWWF muffins were pretty similar to the WWF muffins in texture, taste and appearance. They were a teeny bit lighter in color and had a slightly less wheaty taste. Yummy, of course, but I had yet to try…
Whole Wheat Pastry Flour
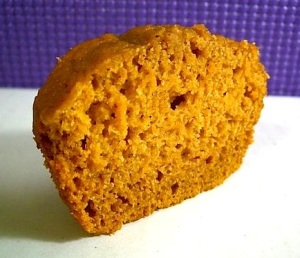
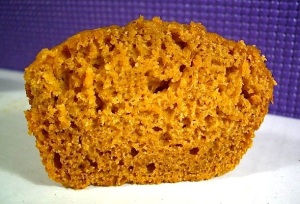
My favorite! WWPF made the softest muffins of all the flours. They also got a little more rounded on top – check out the photo! – than any of the other muffins. I liked that because it was aesthetically pleasing – like any good muffin should be.
Spelt Flour
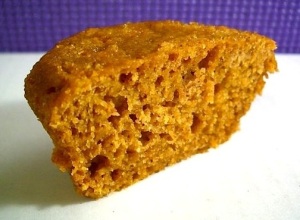
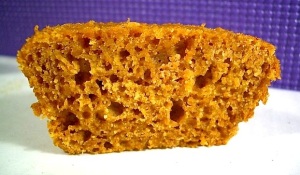
Yay for using SF for the first time! But boo for these muffins being our least favorite. I knew they’d be tricksters as soon as I started mixing the batter. It was runnier than the wheat flour batters. And instead of rising UP in the oven, it spread OUT over the muffin well edges – leaving us with flat muffin tops. They also took longer to bake. The final product? Spongy – can you see from the pic? – and not really as flavorful as the other muffins. Sort of like the spelt overwhelmed the other ingredients. But I’m not giving up on SF just yet! I have a feeling it would be better in cookies than things that need to be soft and fluffy. Just needs to find its place to shine.
Brown Rice Flour
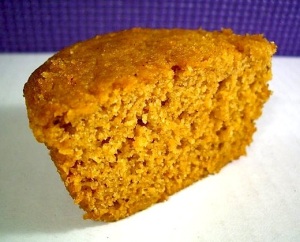
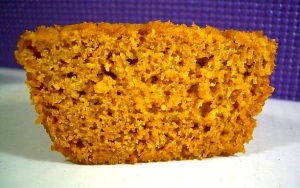
The BRF muffins were Dan’s favorite. At first, they seemed similar to the spelt muffins – runny batter, spread in the oven, flat tops, longer baking time. But they ended up doing they’re own thing! They were noticeably lighter in color than the rest of the muffins. And they had a grainy, but soft, texture to them. I kind of thought they stuck to the insides of my mouth a little, but Dan said I was making that up. Also, BRF seems to have a very subtle flavor itself, so the pumpkin and honey tastes really came through.
For a good side-by-side comparison, take a look at the very first photo in this post. Left to right: WWF, WWWF, WWPF, SF, BRF.
Conclusions:
In terms of muffins, I’m a WWPF fan. Dan’s on team BRF. SF doesn’t fly for either of us. Obviously, there are some variables that could be played around with to influence the success of each flour. Maybe some flours work better with liquid sweeteners – like the honey in this recipe – than others. Or perhaps some would do better with more or less baking soda. Lots of things to consider, but a girl can only do so much!
Anywho, that was fun! Now I want to run my experiment on other baked goods. I see a cookie test in my future!
Since I’m new to spelt and brown rice flour, anyone have any tips for baking with them?