The Times They Are A-Changin’

Dear blog,

My deepest apologies for these months of neglect.

Please take comfort in knowing that it’s not you, it’s me.

Life is changing, and it’s time for new beginnings.  Lots of excitement is in store!

❤ Ashley

Bloggie friends!  Will you ever forgive me for my prolonged absence of late?

The note above speaks the truth!  My life has undergone some pretty big changes over the past few months that have taken my focus away from Sweet + Natural.  May I explain?

Life Change #1:

I can no longer eat gluten.

Yes, it’s true.  After years of undiagnosed – though thoroughly tested – digestive issues, gluten has finally been identified as a key culprit.  As I’m sure you can imagine, this means a whole new way of baking for me.  A whole new way that I honestly have yet to explore.  Gluten is an important little sucker in baked goods, so there is much learning to do regarding this mysterious gluten-FREE realm.  I’m so used to experimenting and altering recipes however I please, but I feel like I need to get the GF basics down before I can go crazy like usual.  And since I like to eat what I bake – and can’t eat things made with most of my familiar ingredients – no new recipes to share!  If any gluten-free peeps out there have some favorite recipes or blogs or tips, please share!

Life Change #2:

I’m going back to school to switch careers!

Oh my goodness am I excited!  As of this September, I will no longer be an advertising professional.  I will be a Master’s in Communications Design student at NYC’s Pratt Institute!  Whoooo!

A career change has been a lo-ong time coming for me, but it took a while to nail down exactly what I wanted to do.  I toyed with natural food chef, market researcher, dietician, magazine marketer, design management professional, and more!  But after being hit with inspiration on a June 2009 cross-country flight – from a Project Runway marathon no less – my future became clear as day.  I was going to be a graphic designer.  Granted, I have no graphic design experience, but I practiced art all through my education and studied art history in college.  Back in high school, I always said I’d go into graphic design.  Seeing the PR designers’ glowing with pride over their creations reminded me that I used to get that same feeling back in my artsy days – and I missed it.

I started researching art schools the second I got home that night – and stayed up til the wee hours of the morning collecting as much information as possible.  I talked to designers working in the field.  I sat at Borders reading design books.  I put together my portfolio, wrote my personal statement and gathered my letters of recommendation.  And nine months after that fateful flight, I was accepted to my #1 choice program!  Now I’m leaving the company I’ve worked at for the past four years – with that saying so long to my steady paycheck and the only career I’ve known. And I’m entering the uncharted world of art school – working my way towards a new career that many of my student peers will already have years of experience in.  Fingers crossed I’m a quick study on those design programs!  I’m a nervous eager excited happy girl.

To complement this new venture, I’ve started a new blog.  Great design starts with great inspiration, so I plan to do everything I can to seek out and absorb all that makes my creativity come alive.  I’ll be documenting my favorite finds on ashley loves.  It’s my interactive mood board – my personal aesthetic captured in an assortment of images.  Feel free to follow along as I post pretty things like this…

and this…

I’m not saying I’ll never post on Sweet + Natural again.  That seems far too definite – and I’m sure visions of muffins will be dancing in my head before long.  I’ll have nothing left to do but get in the kitchen and fire up the oven!  However, my energy is obviously elsewhere right now.  So let’s call this not “goodbye;” just “see you later.”  I heart you all for reading and baking along with me all this time.

Lots of love,

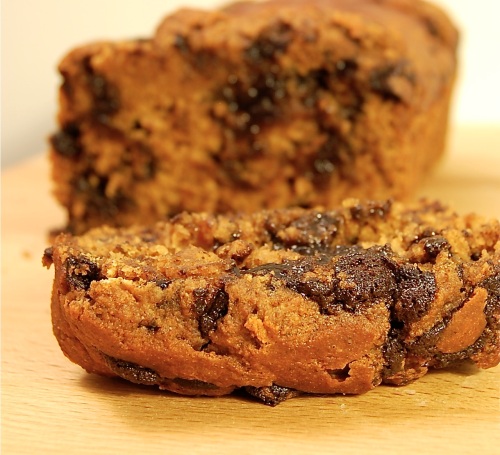
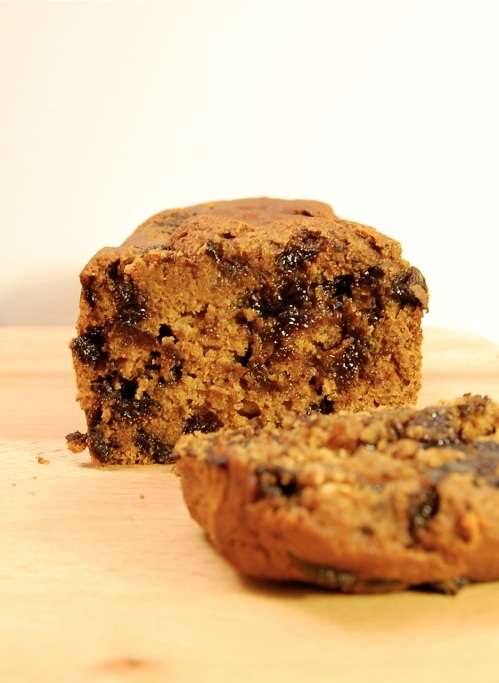
Carob Chip Graham Cracker Bread

The Sister scolded me the other day for not sending her any baked goodies in over a year.  How thoughtless of me!  What kind of sister am I?!  I’m surprised I haven’t been disowned yet.  How lucky I am to have such a forgiving, patient sibling to put up with my lack of baking generosity.

Yes, she is that dramatic.  But only sometimes.  Love you Amanda!

So I asked her what she wanted!  One of her suggestions was a s’mores-inspired treat.  LOVED that idea!  And I knew just what I wanted to make – a sweet, quick bread made from graham cracker crumbs and laced with carob chips and naturally sweetened marshmallows.  It would be perfect.  Except I couldn’t find naturally sweetened marshmallows anywhere!  (Side note: If anyone knows where this can be done, let me know!) Bummer, for sure, but the show must go on.  I forged ahead with my marshmallow-less bread and out of the oven came Carob Chip Graham Cracker Bread.

The recipe is below.  It’s fun and easy and low-fat to boot!

1 cup white whole wheat flour

1 teaspoon cinnamon

1 teaspoon baking soda

1/2 teaspoon salt

1/4 cup applesauce

1 cup whole wheat graham cracker crumbs

1 flax egg

1/3 cup honey

1 cup unsweetened almond milk

1 cup vegan carob chips

Preheat the oven to 350*F. Spray an 8 x 4-inch loaf pan with cooking spray and set aside. In a large bowl, mix together white whole wheat flour, cinnamon, baking soda and salt. In a separate bowl, mix applesauce and graham cracker crumbs (I ground 14 of these crackers in my food processor to get 1 cup) until well combined.  Add flax egg (1 tablespoon ground flax seed whisked with 3 tablespoons water) and mix until well combined.  Add honey and mix until well combined.  Alternatively mix in flour mixture and almond milk, beginning and ending with flour mixture.  Stir in carob chips.  Pour into prepared pan and bake for about 50 minutes. Let cool in pan for 15 minutes before removing.

This was my first time baking with a flax egg substitute – why I have no idea! – and it worked wonderfully.  I will definitely be using it more in the future!  As for the bread itself, how ’bout we turn to The Sister for her thoughts?

When I first received the package that contained the bread, I didn’t have any silverware nearby but couldn’t resist trying a piece. I used my hands to tear off a chunk. It took every ounce of restraint in me not to eat half of the loaf then and there with the plastic wrap still on it. It was so moist, so flavorful and so tasty!

So I guess it’s a keeper!

Do you have any favorite graham cracker treats?

Macaroon Muffins

Coconut flour is trickier to work with than I anticipated my friends…

Despite the time lapse between posts, I can assure you that I have not been totally out of the kitchen over the past weeks.  No, I haven’t been in there as much as usual – who can blame me with work piled up to my head and these cute little distractions running around? – but baking attempts have indeed been made!

I tried a couple times to make another all coconut flour treat – as I enthusiastically stated I would.  After such delicious success with my Mini Chocolate Cupcakes, I thought it would be easy peasy.  Hmmm…not so much.  First up was my own attempt at a banana-cocoa-coconut muffin, using banana as an egg replacer.  FAIL.  Too crumbly!  No rise!  Next I tried to play it safe and follow an already tested recipe.  FAIL numero dos.  Too eggy!  Not enough flavor!

Sigh…

Instead of continuing my seemingly futile experiments and denying you all a new recipe even longer, I decided to temporarily put my all-coconut-flour-treat dream on hold and bake up something sure to work – still using coconut flour of course!

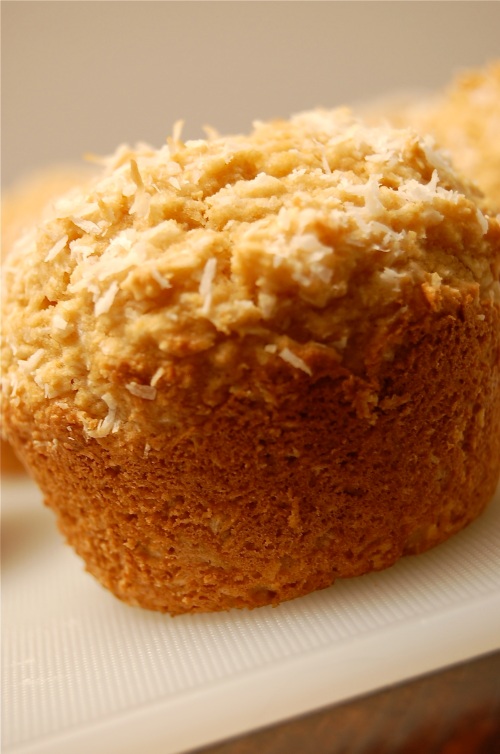
So today we have Macaroon Muffins!  What else would you call a goodie made from coconut flour, coconut milk AND shredded coconut?  Yum.

Here’s the recipe:

1 egg

1/2 cup light coconut milk

1/4 cup unsweetened applesauce

1 teaspoon vanilla extract

1/2 cup maple syrup

1 1/4 cups whole wheat pastry flour

1/4 cup coconut flour

1/4 teaspoon salt

2 teaspoons baking powder

1/4 teaspoon baking soda

1 cup unsweetened shredded coconut

Preheat the oven to 350*F. Spray muffin pan with cooking spray and set aside. In a large bowl, mix together egg, coconut milk, applesauce, vanilla extract and maple syrup until well blended. In a separate bowl, mix whole wheat pastry flour, coconut flour, salt, baking powder, baking soda and shredded coconut. Stir the dry ingredients into the wet ingredients until just blended. Spoon into prepared pans (top with extra shredded coconut if you want to have some fun!) and bake for 16-18 minutes. Makes 8 muffins.

These muffins are scrumptious!  Thank goodness, right?! They are packed with coconut flavor thanks to copious use of coconut-y ingredients and pretty light too from using “light” coconut milk and applesauce instead of oil.  And I’ve said it before, but I’ll say it again: maple syrup makes the BEST sweetener.  If you like coconut, I’m pretty sure you’d be a fan of these.

What’s your favorite coconut recipe?

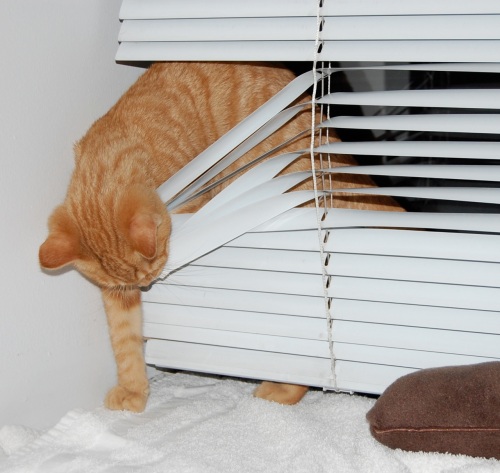
Kittens!

I don’t have a new recipe for you all today.  But don’t go just yet!  I do have something to share that will explain where my mind has been for the past couple of weeks – as my focus has clearly not been on baking.  Well, that’s not entirely true.  I have tried a couple experiments that had great potential.  But they sadly didn’t work out – hence no goodies for Sweet + Natural!  I’m determined to perfect those though.  Stay tuned.

Anyway, if you follow me on Twitter, you may have already heard the news.

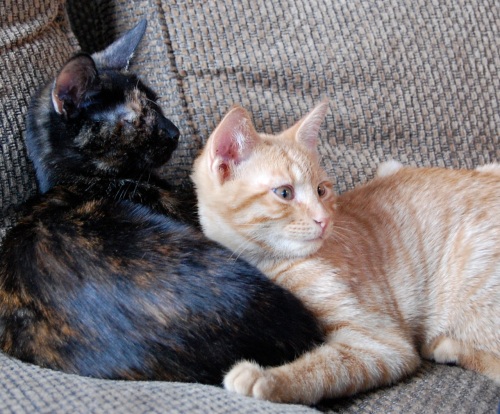
Dan and I adopted kittens!

And I have fallen into and been completely absorbed by the black hole that is kitty cuteness.  Seriously, friends, these kittens are amazing.  I instantly embraced my furmom role and have been taking an exorbitant amount of pictures and talking about them to anyone who will listen – which now includes you!  Allow me to introduce our new furbabies.

This is Chester.

And this is Nora.

Chester is so ridiculously crazy that we sometimes suspect he could be diagnosed as mentally unstable.  Think tearing through the apartment at lightning speed, jumping several feet in the air just because, pouncing on suspicious-looking pens at every opportunity, rustling manically in a paper bag and bolting out the door – or attempting to – the second it opens.

Troublemaker in action.

But our little menace also loves to cuddle, so it balances out.  He’s all about extremes that one.

Nora is a sweetheart.  She was very timid and mostly hid the first couple of days, not knowing what to think of her new home or Chester – lots of hissing occurred during their courting period.  But now she and Chester are BFF – they chase each other around the apartment, cat wrestle and curl up into one furball to sleep together.

She is quick to snuggle up with us for a nap on the couch too.  She also loves to let out teeny meows whenever she enters a room and has an obsession with drinking from our water glasses.

I call her our little supermodel because she’s so pretty.

Work it girl.

We adopted them both from City Critters – a rescue organization in NYC.  Chester was abandoned at a vet’s office with his mom, and Nora was found alone on the street in Brooklyn.  We’re SO glad to be able to provide them a happy home.  And I highly recommend looking at the City Critters adoption listings if you’re in New York and in the market for a cat.  The ladies we worked with are wonderful!

So there you have it!  I promise I will try to peel myself away from them soon to whip up something awesome for you!

Do you have pets?  Are you as obsessed with them as I already am with mine?

Coconut Flour

Friends, I am EXCITED!

As I mentioned in my last post, I recently – for the first time ever! – baked with coconut flour.  And I am officially, completely, utterly and hopelessly enamored with it.  Allow me to elaborate.

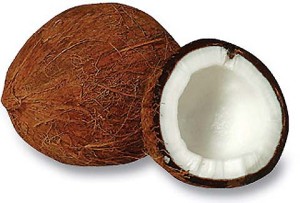
Coconut flour is made from coconut meat that has most of the oil taken out.  It’s dried up and then finely ground into a soft powder.  Simple!  The result is a flour with a beautiful creamy color and natural sweetness.  Open a bag and take a whiff – you will inhale coconut deliciousness!

But that’s not the best part.  Because coconut flour is made from just coconut, that means it’s also gluten-free and grain-free!  Amazing for anyone dealing with such intolerances.  Coconut flour is also a fiber-istic superstar – it has more fiber than wheat bran, oat bran, soybeans – even flax seeds!  And just as much protein as you can find in the traditional whole wheat flour that everyone knows so well.

Are you jazzed yet?

I am.

So how can we use it in our baked goodies?!  Well, this part requires a bit of attention.  Because coconut flour doesn’t have gluten – which helps keep it all together – your treats will just fall apart if you substitute it 100% for another flour.  Now, keep in mind I’m a newbie here, but from some quite extensive Googling, it seems you can replace about 20% of regular flour in a recipe with coconut flour – as long as you add an equal amount of liquid.  All the fiber sucks that stuff up!  So, let’s say your recipe calls for 2 1/2 cups whole wheat flour.  You can use 2 cups whole wheat flour and 1/2 cup coconut flour and add 1/2 cup milk or water or juice.  If you want to use ALL coconut flour – which I totally do! – I’ve read that you should add one egg per ounce of coconut flour.  Eggs bind – just like gluten!  I really want to try a vegan ALL coconut flour recipe, so I’m thinking bananas or flax eggs could work too.  What do you think? Oh, and because coconut flour is already a bit sweet, you don’t need as much sugar in your recipe!

Whew!  I swear it’s not all that complicated.  It’s just baking after all!  Get out there and experiment – and let me know how it goes!

Do you have any great coconut flour recipes?

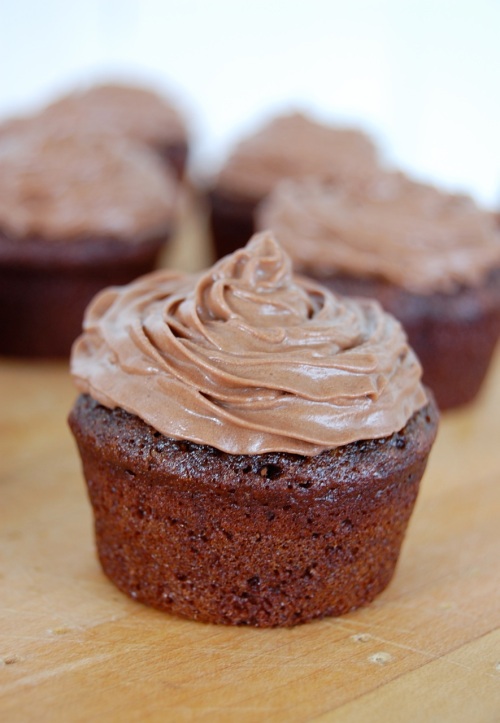
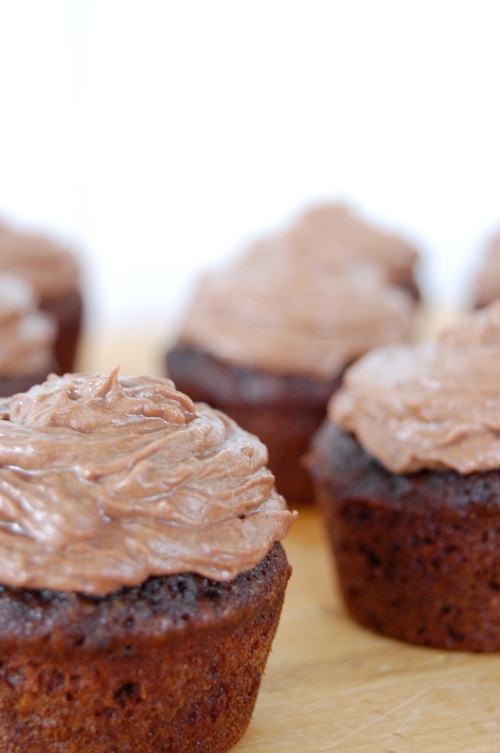
Mini Chocolate Cupcakes + Chocolate Peppermint Frosting

Hiya blog friends!  Before I get into my latest création délicieuse, I wanted to point out a couple fun blog updates for you all.

1. If you missed my last post, you may not have heard the excitement.  I joined Twitter!  So if you’re interested in what I’m up to between posts or care to get sneak peaks into what my next baking adventure might be, you can now follow me there or keep tabs by checking out the widget along the right side of the blog.

2. You already know that everything I bake is full of whole foods and free of refined flours or sugars.  But I thought I’d take the health factor a step further and label my recipes with specific dietary preferences(V) = vegan; (GF) = gluten-free; (DF) = dairy-free.  So check out my Recipes page if you haven’t been in a while.  Perhaps an oldie but goodie will now catch your eye!

Ok, baking time!

My sister and I had BIG plans for our Christmas dinner desserts this year – an eclectic assortment of seasonal mini cupcakes.  Flavors to please every palate.  All bite-sized to allow for maximum taste bud enjoyment without maximum belly filling.

Well, all did not go according to plan…

We started with five cupcake ideas.  Imagine the spread!  The family would be blown away.  But we then remembered all baking and frosting would have to be done on the same day we were cooking Christmas dinner itself – darn tight travel schedule!  And five quickly narrowed to three.  No worries – three still provided a great variety.  So the ingredients were bought, the holiday arrived, the family opened presents and we got to work.

And two of the three recipes bombed!  One did not rise at all and left us with flat cupcake “discs” as they not so affectionately became known.  The other was a crumbly mess – though we were able to miraculously salvage it by transforming the cupcake scraps into a quite yummy bread – cupcake? – pudding.  Chaos feeds creativity people.

And then there was one…

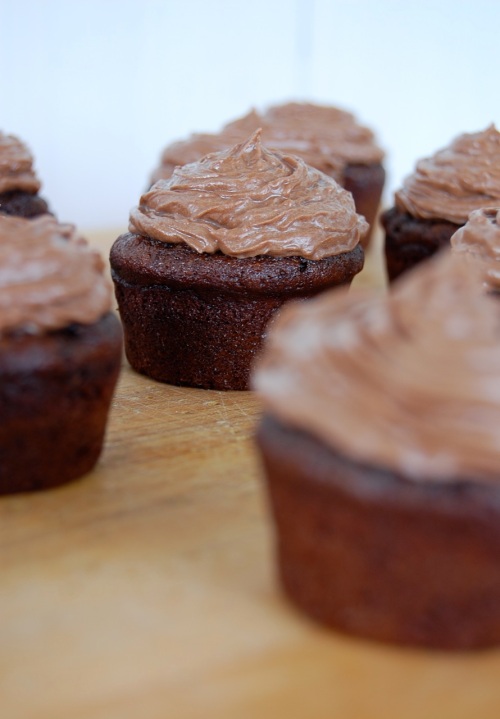
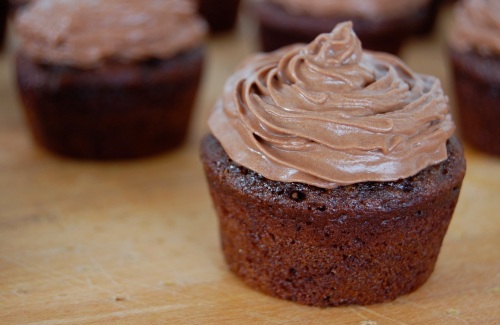
The sole recipe to survive – or dare I say, thrive! – was for Mini Chocolate Cupcakes + Chocolate Peppermint Frosting.  I found this recipe for chocolate cupcakes and this one for chocolate frosting and basically followed them to a tee.  Just added some vanilla extract to the cupcakes – because I believe no recipe is complete without vanilla – and some peppermint extract to the frosting – because otherwise we wouldn’t have Chocolate Peppermint going on, now would we?

Oh – and these were very fun for me to bake because they contained a new-to-me ingredient – COCONUT FLOUR!  Using coconut flour is not only thrilling for me – it also means the cupcakes are gluten-free!  Whoo!

Here’s the recipe:

Cupcakes:

1/4 cup coconut flour

1/4 cup cocoa powder

1/4 teaspoon salt

1/2 teaspoon baking soda

3 eggs

1/4 cup vegetable oil

1/2 cup agave nectar

1 teaspoon vanilla extract

Frosting:

1/2 cup non-hydrogenated butter substitute (I use Earth Balance)

2 cups unrefined powdered sugar

1 tablespoon vanilla extract

3/4 teaspoon peppermint extract

2 tablespoons unsweetened soy milk (or almond, rice, etc.)

1/4 cup cocoa powder

dash of salt

Preheat the oven to 375*F.  Spray mini cupcake pan with cooking spray and set aside.  In a large bowl, mix together coconut flour, cocoa powder, salt and baking soda.  In a separate bowl, mix together eggs, oil, agave and vanilla extract until well-combined.  Add wet ingredients to dry ingredients and stir until blended.  Pour batter into prepared pan and bake for about 10 minutes.

While cupcakes are cooling, prepare frosting by blending together non-hydrogenated butter substitute, unrefined powdered sugar, vanilla extract, peppermint extract, soy milk, cocoa powder and salt with an electric mixer until smooth.  Once cupcakes cool, spread frosting on top.  Makes 16 mini cupcakes.

These cupcakes are SO cute and SO tasty!  I think I have a new addition to the Sweet + Natural favorite recipes list.  The frosting is an absolute dream.  Fluffy but rich.  Chocolately but refreshing.  And I am very excited to have had such success with my first ever coconut flour baking attempt!  That is one ingredient that will definitely be experimented with further in my kitchen.  Yep yep.

Have you ever baked with coconut flour?  Any tips for the newbie?

Twitterific

Hope you all had absolutely glorious holidays!  Mine was filled with family and friends and pets and delicious food.  So pretty much wonderful.  Dan also joined me for the trip to St. Louis this year, so that was a special treat!

Before I post my next baking project, I thought I’d share one little tidbit…

With the coming of a new year, now is the time for new things!  Well, new for me at least – my sis convinced me to join Twitter!  So if you’d like to get a peak into my daily life, feel free to follow me at @sweetandnatural.

If I had tweeting capabilities over the past few days, here are some things you may have heard:

“Matching sister sweaters.  Work it.”

“How much longer til I get my own cat and dog?!”

“Jake and Dakota: 14-years-old and fabulous.”

“Late night chocolate peppermint cupcakes: a new bedtime ritual?”

Recipe to come!  They will make you look just as mischievous as I do.  Trust.

Tata for now!  Be back soon!

Gingerbread

Merry Christmas and happy holidays…

Santa Claus is coming to town…

Let it snow, let is snow, let it snow…

Chestnuts roasting on an open fire…

It’s the most wonderful time of the year…

Etc, etc, etc…

I HEART THE HOLIDAYS!

This really truly is my favorite time of year.  Something about the cheesy joyful Christmas music and festive decorations and anticipation in the air makes me warm and fuzzy and happy inside.  I am proudly a total sucker for it and feel all cozy everyday and everywhere I go.  Even the chilly weather is tolerable!  Ehh…sort of.  I don’t do well with cold.  Unless it’s snowing!  Sigh.  Contentment.

That said, the older I get, the more the season sneaks up on me.  It seems that Thanksgiving dinner dishes are barely washed when I blink and it’s Christmas.  All before I can even get a chance wear my favorite holiday sweater!

Well, this year, I said no more!  I made a vow to go immediately into holiday mode the second Thanksgiving weekend was over.  So my mini-Christmas tree quickly found its way out of the box under my bed and onto the dining table.  Little Santa and Mrs. Claus figurines stand by its side.  A scented candle is lit every night – smelling of cinnamon snap then spiced pear then Christmas cookie as the wick burns down.  Holiday tunes are loaded onto my iPod and played on the daily.  Both work and personal computer background images are now illustrations of Christmas trees.  My Google homepage displays the Winter Village theme – super cute btw! – right above a red and white Christmas countdown.  I even manually changed my Gmail colors to be red and green!

With all of these steps taken to be Miss Holiday Spirit 2009, all that was left to do was bake up a season-inspired treat.  So I decided to try my hand at Gingerbread!  I’ve always been curious about Gingerbread – because it is quite possibly the epitome of holiday baked goods – but have never actually eaten it.  I know, weird, right?  I guess I was always too busy filling up on peanut butter kiss cookies and Grandma’s pumpkin cake roll to bother looking its way.  It was about time.

Here’s my recipe for Gingerbread, adapted from this recipe:

1/2 cup Sucanat

1/3 cup vegetable oil

1 egg

3/4 cup molasses

1 1/2 cups whole wheat pastry flour

1 cup brown rice flour

1 1/2 teaspoons baking soda

2 teaspoons cinnamon

2 teaspoons ginger

1 teaspoon cloves

1/2 teaspoon salt

1 cup hot water

Preheat the oven to 350*F.  Spray an 11×7-inch pan with cooking spray and set aside.  In a large bowl, mix Sucanat, vegetable oil, egg and molasses until well combined.  In a separate bowl, mix whole wheat pastry flour, brown rice flour, baking soda, cinnamon, ginger, cloves and salt.  Add dry ingredients to wet ingredients and mix until just blended.  Stir in hot water.  Pour into prepared pan and bake for 40 minutes.

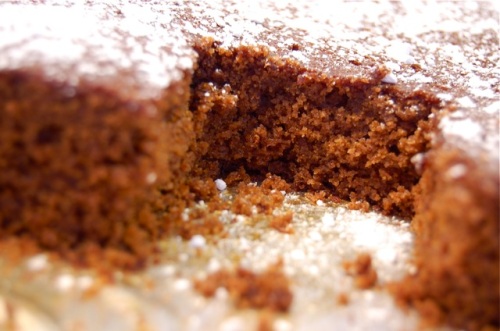
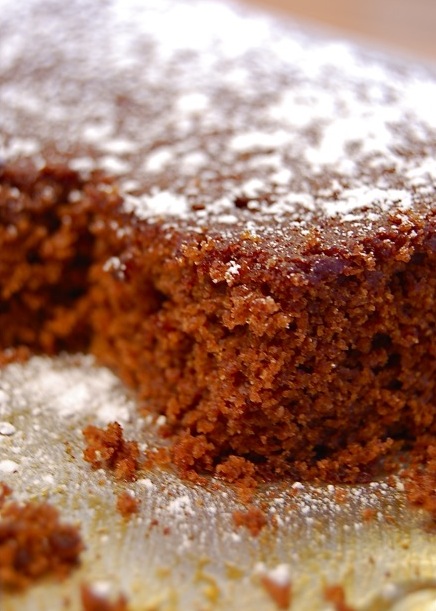
Now I know I don’t have anything to compare this to, but I thought the Gingerbread tasted delicious!  The spice combination worked wonderfully together and completely captured the flavor of the holidays.  And the brown rice flour gave the bread a bit of texture – sort of like cornbread!  I was a fan.

Is there a holiday treat you’ve always wanted to try, but never have?

Ashley + Dan’s European Vacation: Part III – Florence

Hope everyone had fantastic Thanksgiving weekends!   I enjoyed a relaxing few days with Dan’s family in Philadelphia.  Good company, lots of yummy food and baked goodies and a little nephew to play with.  Fun!

Now back to reality, and back to Ashley + Dan’s European Vacation!

When our time in Nice was up, Dan and I headed over to la gare to catch our train to FLORENCE!

The ride took us along the scenic Mediterranean coast and up to Milan where we were to board our connecting train to Firenze! However, there was a slight complication when our first train was late, causing us to miss the second, and the cranky man behind the ticket service counter did not speak English.  We do not speak Italian.

Never one to be foiled, I held up my ticket from Nice, declared “retardo” – which was a wild guess for the Italian translation of “late” based on my fading high school knowledge of French – and waved my hands around a bit.  Somehow, I was miraculously understood – and for future reference, “retardo” actually does mean “late”!  We got switched to the next train out and all was well.  Patience and perseverance, my friends.

Let me just say that arriving in cities at sunset is the only way to go.

View of the Pont Vecchio, a quick hop, skip and a jump away from our bed and breakfast.

Speaking of our bed and breakfast, it was the coolest EVER.  Typically, B + B’s make me think cozy and quaint, but this one was super modern and high-tech.  Touch pad locks let us into the building and our room and contemporary black and white design elements decorated the space.  Check out our temporary home.

The B + B was comprised of four bedrooms and a living space on the third floor of an old building tucked down an alley behind a small piazza. It was like a little secret hideaway.  The owners, Giacomo and Francesca, were ridiculously gracious and made our dinner and musuem reservations each day.  And a very nice young man served us breakfast every morning.  We were well taken care of.  If I am every lucky enough to return to Florence, I will most definitely be staying here.  You should too!

Before I continue, I must tell you up front that Florence is superbly enchanting.  I am officially and obsessively in LOVE.  I mean, it was the birthplace of the Renaissance!  How could it not be alluring?!  There is character in every building and piazza.  There is fantastic art to be seen.  And the food – GAH! – the FOOD!  Totally incredible.  It’s like the city was built on romance.

Let’s take a tour!

Since I already brought it up with the sunset pic above, we’ll start with the Pont Vecchio.  It’s a little bridge that connects the left and right banks of Florence and offers visitors insanely beautiful views down the Arno River throughout the day…
…and into the night.

Had to show another one of those.  Too beautiful!  And here’s what the Pont Vecchio looks like when you’re not standing on it.

All those things jutting out are tiny jewelry and souvenir shops.  Not my thing, but I did find this adorable.

There’s a little gate thing on the Pont Vecchio and tons of locks are fixed to it.  Each lock has a couple’s name on it.  You know, like “Amanda + Zach 4 Ever.”  Awwwww.  I’m a sucker for love!

Ok, can we talk art history for a bit?

Now I’m not typically one to swoon over old cathedrals, but the Duomo had me at buongiorno.

The Duomo, also known as the Basilica di Santa Maria del Fiore or the Florence Cathedral, is one of the largest cathedrals in Italy and took nearly two centuries to construct – beginning in 1296!  It was designed primarily by Arnolfo di Cambio, an Italian architect and sculptor.

I got a little trigger happy snapping pics of it’s awesome green and red marble façade.  SO.  COOL.

The Duomo dome is the largest brick dome ever constructed and was completely groundbreaking at the time it was built – it was the first ever to not have support from the ground!

Designed by Filippo Brunelleschi after he won a competition for the commission – they held a lot of those back then.

Dan and I also took on the feat of climbing 463 stairs – in cramped, hot conditions – to get to the top of that dome.  But it was well worth the effort.

That tall structure is the Bell Tower, or Giotto‘s Campanile.

So high up!  I am scared of heights.  But I acted brave for the sake of obtaining approximately 248 photos of Florence rooftops.

And across from the entrance to the Duomo is the Baptistry, which is older than the Duomo itself!

I just realized that Dan is in that picture.  He looks like a GIANT, no?!

The Baptistry is most famous for its bronze doors that are comprised of relief sculptures of biblical scenes designed by Lorenzo Ghiberti.  He also competed to get that commission.

Not too far away from the Duomo is the Piazza della Signoria, the historically political center of Florence.

That alcove on the left under the arches is the Loggia dei Lanzi – a bunch of Renaissance sculptures in there.

My favorite to see was The Rape of the Sabine Woman – I love being up close and personal to pieces that I learned about back in the day!

Just behind the Loggia dei Lanzi is the Uffizi, one of the oldest art museums in the world.

Renaissance art as far as the eye can see in there!  Love it.

We also saw the very famous David by Michaelangelo – it is HUGE!  Seventeen feet tall!  I mean, how many times did I study that sculpture in college and I never once bothered to look at the dimensions?  Blown away.

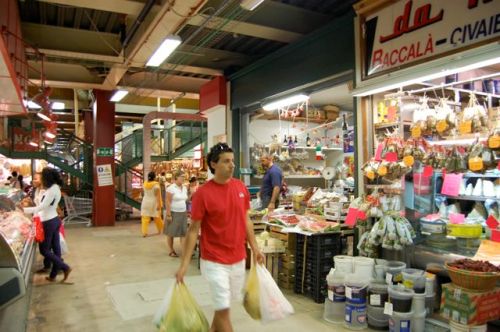
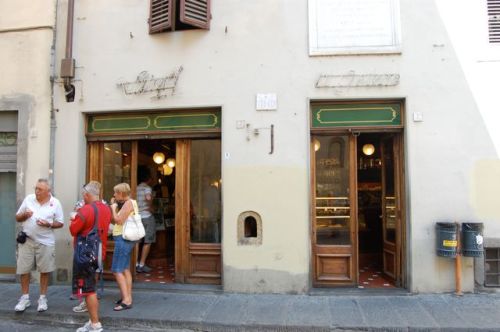
Of course, after seeing food markets in Barcelona and Nice, we made it a point to seek one out in Florence.  Enter Mercato Centrale.

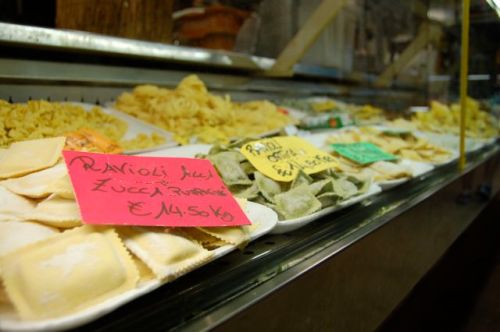
Fresh pasta!

Mini wine bottles!  I LOVE mini things.

See blurry Dan in the background?  He was buying beer.

And the Excessive Gelato Consumption continued, most notably at Vivoli.

Best gelato in Florence.  Mmm – hazelnut creaminess.

I don’t have pics of any of the meals I ate, but it is worth noting that my goal in Florence was to eat as much pasta as possible!  I had lasagna – which was interestingly tomato-sauce-less, but absolutely delicious – and flat, long noodles and twisty ones and melt-in-your-mouth-amazingly-yummy gnocchi with pesto.  All the pastas were homemade and SO crazy tasty.

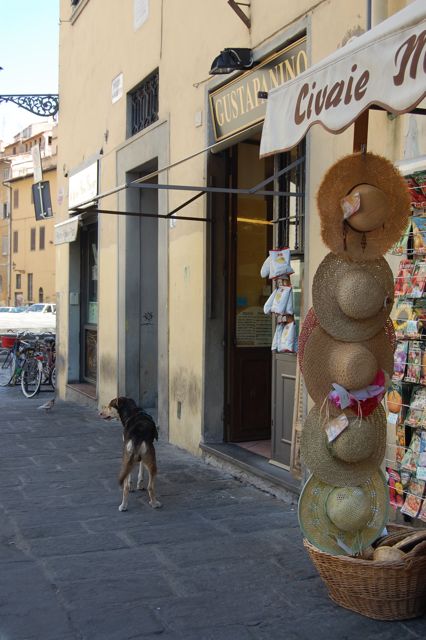
Last, but certainly not least, we have The Dogs of Florence.

And that was the end of our unforgettable European vacation.  It was the best trip of my life and I am so grateful to have been able to share it with Dan.  He’s a super fun travel buddy!

Hope you all had fun coming along for the ride!  Adiós, au revoir and arrivederci!

Sticky Tahini Date Cookies

DSC_0597_2_2

So glad you guys are having fun with my European vacation posts!  I love reminiscing on good times, so am happy to share.  However, before I turn into a travel guide, I thought I’d break it up a bit by going back to my roots and giving you a new treat to bake!

I’ve been eating a lot of hummus of late.  I eat it at home.  I eat it at work.  I eat it down the street from my apartment at a restaurant called – yep – Hummus Place – which is excellent and cheap for any fellow New Yorkers out there!  Hummus with carrots.  Hummus with chips.  Did you know that hummus, avocado and tomato sandwiches are the best things ever?  No?  Well, now you do.

With all the hummus eating going on, I thought I’d try to make my own.  All I needed to add to my pantry was a jar of tahini.  Bought that, made the hummus, ate the hummus, ’twas tasty.

Then I had a nearly full jar of tahini to finish.

You may have noticed by now that any leftover ingredients in my apartment are destined to be featured in a baked good – ahem…Pumpkin BrowniesBanana Coconut Bars…ahem.  So obviously I was off to make tahini cookies.  Isn’t that what you would do?  Since I was recently drooling over giant Barcelona dates, it was only fitting that I toss juicy Medjools into the mix as well.

DSC_0594_2_2

Here’s my recipe for Sticky Tahini Date Cookies, adapted from this recipe:

1/2 cup tahini

1/2 cup honey

1 teaspoon vanilla extract

1/2 cup chopped Medjool dates

1 1/2 cups oats, coarsely processed

1 teaspoon cinnamon

1/4 teaspoon salt

1/2 teaspoon baking soda

1/2 cup chopped walnuts

Preheat the oven to 350*F.  Grease cookie sheets – don’t forget these are sticky cookies!  In a large bowl, combine tahini, honey, vanilla extract and Medjool dates until smooth.  In a separate bowl, mix together oats, cinnamon, salt, baking soda and walnuts.  Add dry ingredients to wet ingredients and mix until well-blended.  Drop spoonfuls of batter onto prepared cookie sheets.  Bake for 10 minutes. Cool on the cookie sheets for a couple minutes before removing to cool completely.  Makes 15 cookies.

DSC_0608_2_2

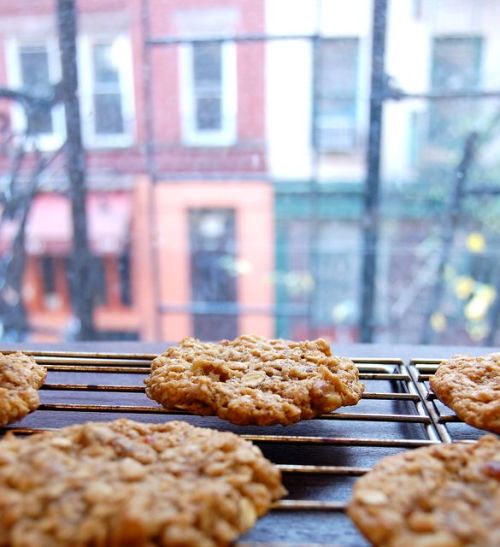
Off topic, but look out the window – isn’t my block cute?

These. are. so. GOOD!  Like surprisingly delicious!  You can definitely taste the sesame seed flavor, and it’s totally enhanced by the cinnamon and vanilla.  I’m already imagining all the things you could add to these cookies – other dried fruits or nuts, flax seed, more spices.  And they’re so nutritious!  Make them now!

Have you ever used tahini when baking something sweet?

DSC_0598_2_2


Contact

ashley.sweetandnatural@gmail.com

Quantcast